
This guide explains pre- and post installation procedures to ensure the success of the Bp Premier upgrade.
Applies to: Bp Premier Oxford series.
Pre-Installation activities
Review the Bp Premier System Requirements to ensure your server and workstations are able to run Bp Premier sufficiently.
Before running a Bp Premier upgrade, it is important to review the most recent release notes to check prerequisites and answers to questions such as:
- Which version can I upgrade from?
- Which data update do I need?
- Which database and operating system versions are supported?
- When should I upgrade?
- How do I upgrade?
TIP Always check the release notes for information about third-party providers your practice may use. Some Program updates can affect Partner Integrations. Review the release notes for any Bp Partner integrations you have and potential actions.
Download and run the latest Drug Update on your Bp Premier server computer.
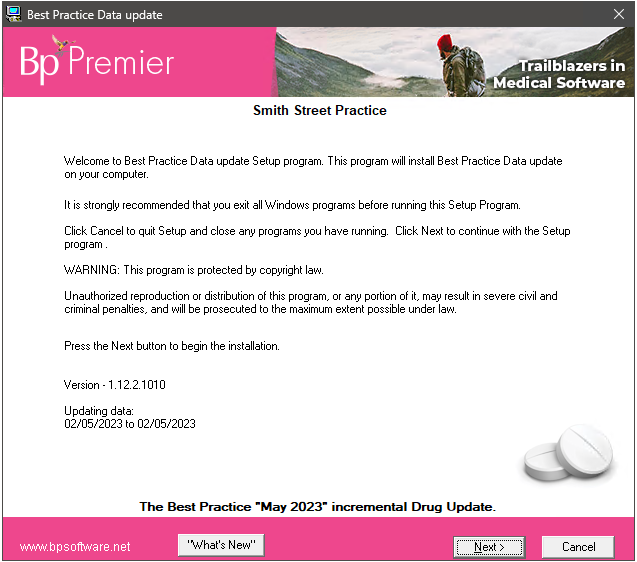
TIP See Update the drug database for full instructions on how to update the drug database.
Best Practice Software recommend running the program upgrade outside of business hours to limit issues.
Back up the entire database. See Back Up and Restore Bp Premier for more information.
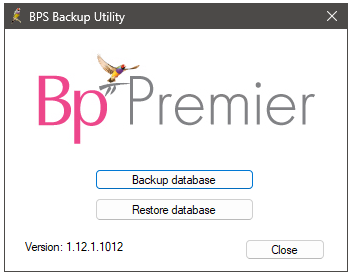
After the backup has completed, BP Backup will notify the success or failure of the backup. Best Practice Software recommend that you copy or move the backup files to an external device that can be stored in an off-site location.
TIP The easiest and most secure way to roll back if you find issues after a program update, is to back up and restore.
- Connect your laptop to the practice network.
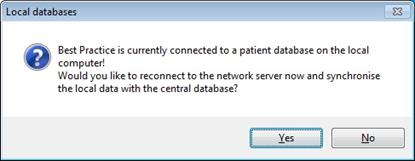
- Log in to Bp Premier. The following message will be displayed.
- Select Yes.
- The server will upload the data entered when working remotely. When complete, the message You are now connected to the network server will be displayed.
- Close the message and log out of Bp Premier.
- Reboot the laptop for the changes to take effect.
TIP See Download the Bp Premier Database for Remote Use for more information.
Log all users out of the server and all clients before you upgrade. If any instances of Bp Premier are running during the upgrade process there may be a risk of data corruption.
Ensure that none of the following Bp applications are running:
- BPS Check Databases
- Check Databases
- Results Import
- Update Database
- BPS Backup
- Live Update.
Restarting a server prior to performing a Bp Premier Upgrade is a vital step to ensure system stability and security. This process allows pending updates to be fully applied and clears any temporary issues that might interfere with the upgrade.
Additionally, rebooting helps to refresh the system's memory and ensures that all applications are properly closed, reducing the risk of data corruption during the update process.
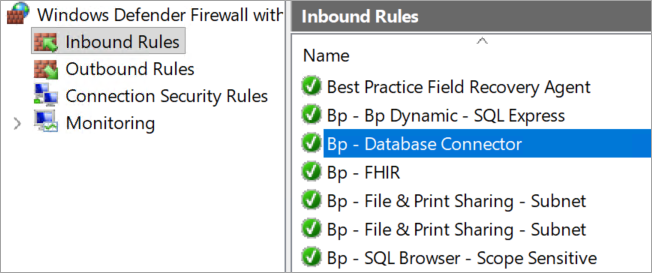
IMPORTANT If you are upgrading to Bp Premier Oxford SP1 Release Notes or above and your Practice uses a third-party firewall, this rule may need to be configured manually.
See the support article Manually configure firewall rule for Windows Defender for instruction on how to manually configure Windows Defender firewall to allow communication with the Best Practice Database Connector.
All workstations look to the server for updates. The server computer should always be updated first.
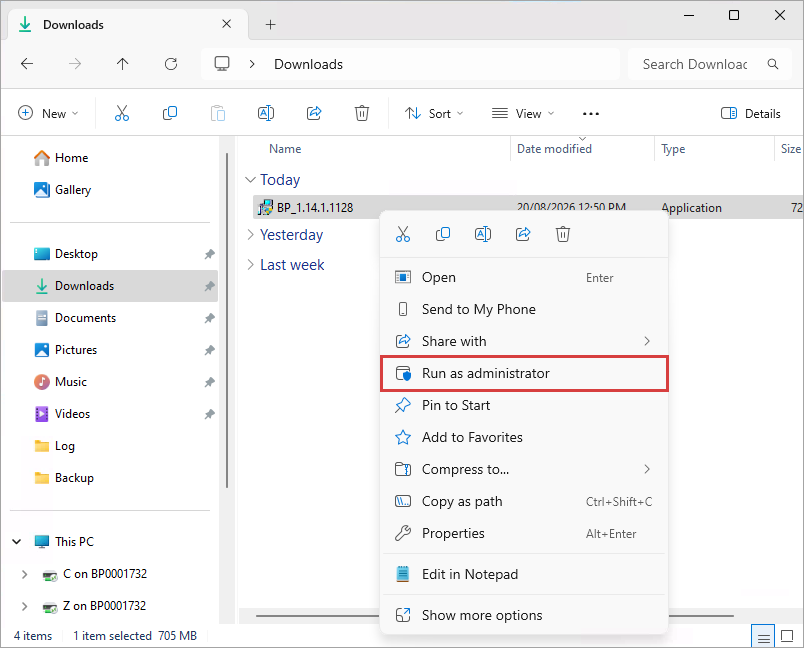
Bp Premier Program Updates must be Run as administrator with elevated privileges.
Post Installation activities (if required)
Some Bp Premier users have reported connection issues between the server and client after running program updates.
"Bp Premier couldn't connect to the database. Please try again. If the problem continues, contact your practice administrator or IT for assistance."
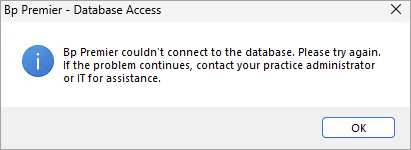
IMPORTANT If there are any issues with your upgrade post installation, please carry out the following instructions to run the update database utility.
The Update Database Utility must be run:
- On the Bp Premier server only
- After operating hours
- With no active Premier client connections.
If the Update Database utility does not finish successfully, apply all Microsoft Windows updates first and retry.
- Back up the Bp Premier database so an up-to-date restore is available. See Back Up and Restore Bp Premier for more information.
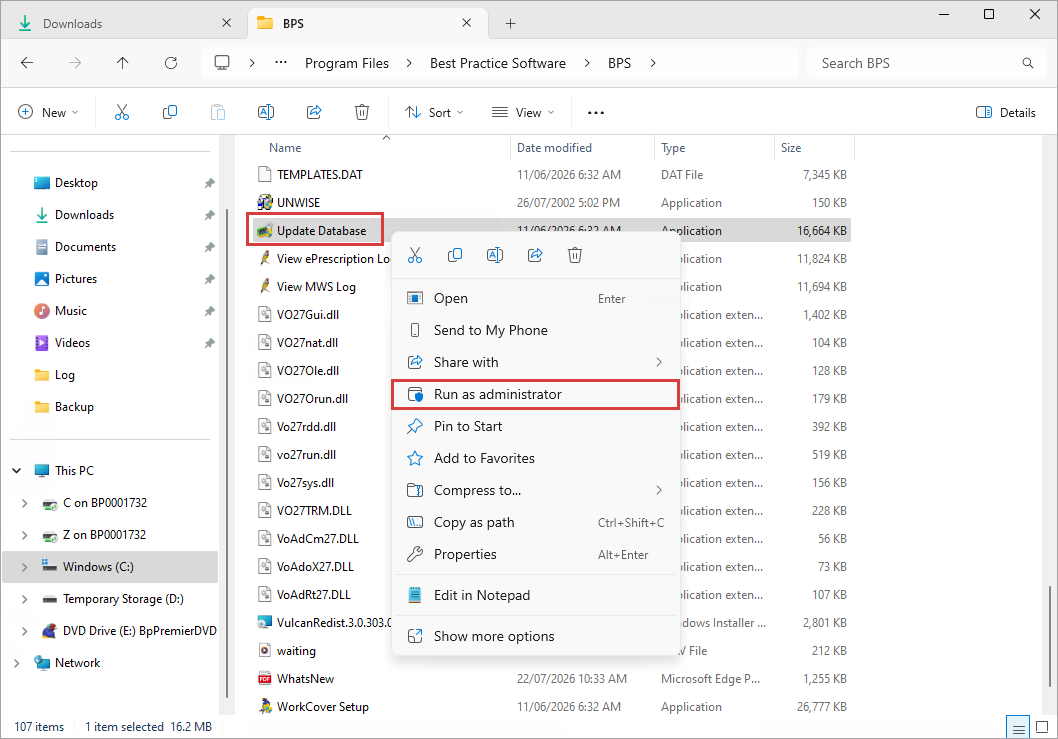
- Navigate to C:\Program Files\Best Practice Software\BPS and locate the Update Database utility.
- Right-click on the utility and select Run as administrator.
- Once the utility has completed, log in to Bp Premier.
Further resources
IMPORTANT Contact Bp Support on 1300 40 1111 if issues are found with Bp Premier after install.
Information correct at time of publishing (02 October 2026).



 AU
AU 